- 12
- 11月
介绍如何制作Slackware 14.1的安装DVD,包括32位和64位,在一张4.37GB的DVD是可以包含的。
制作g2ldr,用于引导32位和64位安装程序
$ grub-mkimage -o core.img --format i386-pc biosdisk ext2 fat iso9660 halt reboot \
    normal minicmd ntfs chain configfile ntldr search search_fs_file \
    search_fs_uuid search_label usb usb_keyboard extcmd echo linux vga \
    gfxmenu gfxterm vbe
生成一个core.img,包含GRUB2启动所需要的基础模块。
$ cat cdboot.img core.img > g2ldr
生成可用于引导CD/DVD的引导文件,cdboot.img可以在/usr/lib{64}/grub/i386-pc里找到。
在光盘根目录创建boot/grub目录,并在grub目录下创建i386-pc目录。
把上面生成的g2ldr复制到boot/grub/i386-pc目录下。grub.cfg放在boot/grub目录下。
把/usr/lib{64}/grub/i386-pc/*.mod复制到boot/grub/i386-pc目录下。
分别把32位的kernels, isolinux, slackware复制到光盘根目录,64位的也一样,只不过要把目录后面加上64,用来表示64位,64位还要把EFI目录也复制过去。
光盘目录结构大致如下:
EFI
boot
isolinux
isolinux64
kernels
kernels64
slackware
slackware64
在UEFI模式下,系统可以找到EFI/BOOT/bootx64.efi,并执行它来引导系统。一定要注意大小写,小写的话GRUB2会找不到配置文件的。
boot/grub/grub.cfg:
set default="0"
set timeout="30"
set hidden_timeout_quiet=false

#if loadfont /EFI/boot/unicode.pf2; then
#  set gfxmode=800x600
#  load_video
#fi

#terminal_output gfxterm

# for x86

menuentry "Slackware 14.1 huge.s kernel"{
  echo "Loading huge.s kernel and installer initrd.  Please wait..."
  linux /kernels/huge.s/bzImage vga=normal load_ramdisk=1 prompt_ramdisk=0 ro printk.time=0 nomodeset SLACK_KERNEL=huge.s
  initrd /isolinux/initrd.img
}

menuentry "Slackware 14.1 hugesmp.s kernel"{
  echo "Loading hugesmp.s kernel and installer initrd.  Please wait..."
  linux /kernels/hugesmp.s/bzImage vga=normal load_ramdisk=1 prompt_ramdisk=0 ro printk.time=0 nomodeset SLACK_KERNEL=hugesmp.s
  initrd /isolinux/initrd.img
}

menuentry "Slackware 14.1 huge.s kernel (use KMS console)"{
  echo "Loading huge.s kernel (with KMS) and installer initrd.  Please wait..."
  linux /kernels/huge.s/bzImage vga=normal load_ramdisk=1 prompt_ramdisk=0 ro printk.time=0 SLACK_KERNEL=huge.s
  initrd /isolinux/initrd.img
}

menuentry "Slackware 14.1 hugesmp.s kernel (use KMS console)"{
  echo "Loading hugesmp.s kernel (with KMS) and installer initrd.  Please wait..."
  linux /kernels/hugesmp.s/bzImage vga=normal load_ramdisk=1 prompt_ramdisk=0 ro printk.time=0 SLACK_KERNEL=hugesmp.s
  initrd /isolinux/initrd.img
}

# for x86_64

menuentry "Slackware x86_64 14.1 huge.s kernel"{
  echo "Loading huge.s kernel and installer initrd.  Please wait..."
  linux /kernels64/huge.s/bzImage vga=normal load_ramdisk=1 prompt_ramdisk=0 ro printk.time=0 nomodeset SLACK_KERNEL=huge.s
  initrd /isolinux64/initrd.img
}

menuentry "Slackware x86_64 14.1 huge.s kernel (use KMS console)"{
  echo "Loading huge.s kernel (with KMS) and installer initrd.  Please wait..."
  linux /kernels64/huge.s/bzImage vga=normal load_ramdisk=1 prompt_ramdisk=0 ro printk.time=0 SLACK_KERNEL=huge.s
  initrd /isolinux64/initrd.img
}

# Detect installed operating system and allow booting them from GRUB:
menuentry "Detect/boot any installed operating system" {
  configfile "/EFI/BOOT/osdetect.cfg"
}
在光盘根目录执行下面的代码:
$ mkisofs -o /tmp/slk-14.1-dvd.iso \
  -R -J -A "Slackware Install" \
  -hide-rr-moved \
  -v -d -N -l \
  -no-emul-boot -boot-load-size 4 -boot-info-table \
  -b boot/grub/i386-pc/g2ldr \
  -c boot.cat -hide boot.cat \
  -eltorito-alt-boot -no-emul-boot -eltorito-platform 0xEF \
  -eltorito-boot isolinux64/efiboot.img \
  -m 'source' \
  -V "SlackDVD" .
这段代码可以在64位的isolinux/README.TXT找到。
下面就是等镜像文件生成了。
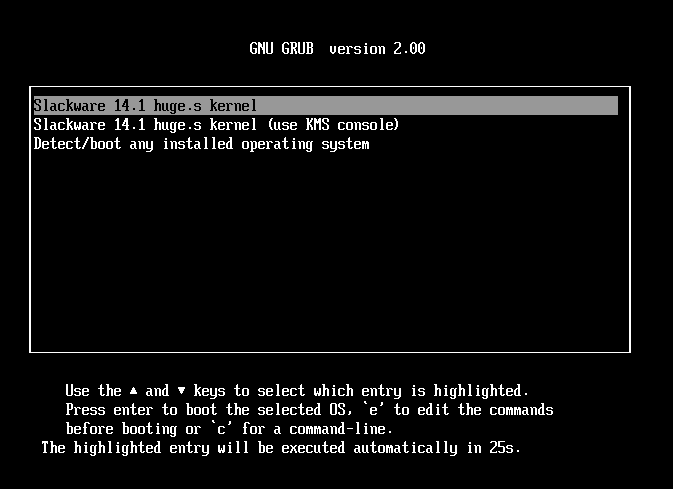
UEFI模式下的启动效果图:

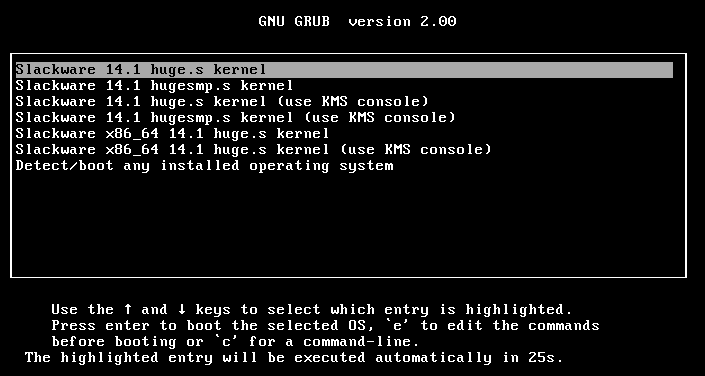
传统BIOS模式下的启动效果图:
